Hi there, it’s Mia from the Customized OPS PC team. Lately, I’ve been fielding so many questions from clients, partners, and even folks who’ve just ordered one of our Customized OPS PCs: “How do I connect this to Wi-Fi?” It might seem like a basic question, but the truth is, OPS PCs are built for specific use cases—mounted in commercial displays, interactive whiteboards, retail kiosks, classroom smart boards, all kinds of space where they’re not just sitting on a desk next to a router. That means their setup process is a little different from a regular desktop or laptop, and I’ve seen way too many folks stress over little steps that take 2 minutes max once you know them. Today, I’m walking you through the exact, reliable steps we walk every new client through when we ship their Customized OPS PC, plus a few pro tips I’ve picked up over the years working with these devices. Customized OPS PC

First, let’s start with the basics. When you unbox your Customized OPS PC, the first thing you should check for is its Wi-Fi capability. A lot of Customized OPS PCs are built to order, so we don’t just ship every unit with the same wireless card—we customize the internal components based on what the client needs. For example, if you’re using it for a classroom interactive whiteboard where it needs to stream HD video to and from the cloud, we’ll spec in a dual-band Wi-Fi 6 (802.11ax) card for faster speeds and less interference. If it’s for a small retail kiosk in a shopping mall, we might include a more robust Wi-Fi 5 card with longer range. But before you even plug the OPS into a display, double-check the side or back of the unit (or the packing slip) to confirm it has a wireless module. If it doesn’t, that’s not a problem—we can add one for you when you order, no extra hassle, and it’s far more reliable than trying to plug in a third-party USB Wi-Fi adapter, which can stick out of the OPS and get knocked loose when it’s mounted.
Now, let’s get to the actual connection process. I’m going to break this down for both Windows and Linux Customized OPS PCs, since those are the two operating systems we support for most commercial use cases—Mac OS is not common for OPS because it’s optimized for consumer devices, so I won’t cover that. Also, I’m assuming you’ve already mounted your OPS into your compatible display (most modern displays have an OPS slot on the back) and connected the power cord and display cable. If you haven’t, that’s step one, but we cover mounting and basic connections in the quick-start guide we include with every unit, so this starts after that.
First up: Windows-based Customized OPS PCs. Power on the OPS, wait for it to boot up (it takes about 30 seconds for a fresh unit, since it’s optimized for fast startup), and look in the bottom right corner of the screen for the network icon—it looks like a little series of bars. If you don’t see it, right-click the taskbar, select “Taskbar settings,” scroll to “Select which icons appear on the taskbar,” and make sure “Network” is toggled on. Click that network icon, and you’ll see a list of all available Wi-Fi networks in range. Find your network name (SSID) in the list, click it, then click “Connect.” If your network is password-protected (which it should be, for security), type in your Wi-Fi password, then click “Next.” Now, here’s a step that trips a lot of people up: Windows will ask you if you want this PC to be discoverable on the network. For most business and commercial uses—like if you’re streaming content to the display or connecting the OPS to a local printer—select “Private” (it’s more secure for your local network). If it’s a public space, like a trade show kiosk, select “Public.” Wait a few seconds, and you should see “Connected” under your network name. If it says “Limited” or “No internet,” that means there’s a quick fix—let’s troubleshoot that in a minute.
Next, Linux-based Customized OPS PCs. A lot of our educational and industrial clients prefer Linux for its stability and low resource usage, so this is just as important. Power on the OPS, boot into your Linux distro (we usually ship Ubuntu or Debian for OPS, since they’re well-supported), and look for the network icon, which is usually in the top right corner of the screen, next to the battery or volume icon. Click that icon, and you’ll see a list of available Wi-Fi networks. Select your SSID, click “Connect,” enter your password when prompted, then click “Connect” again. Linux is a little more straightforward than Windows here, but if you get an error, the first thing to check is that your wireless card drivers are up to date—we pre-install the correct drivers for every Customized OPS PC we ship, but sometimes when you update the OS, drivers can get out of sync, so a quick sudo apt update && sudo apt upgrade in the terminal will fix that.
Now, let’s talk about troubleshooting, because even with the best setup, things can go wrong, and I’ve seen every single issue there is with OPS PC Wi-Fi connections. The most common problem is signal strength. OPS PCs are designed to fit into the narrow OPS slot on the back of a display, which is often made of metal, and metal blocks Wi-Fi signals. If your OPS is mounted near the top of a large, metal display, that can cut the signal by 50% or more. How to fix that? First, try moving your Wi-Fi router closer, if possible. If that’s not an option, we sell custom low-profile Wi-Fi antennas that you can mount outside the display, instead of leaving the internal antenna in the tight slot—they stick out less than an inch, and they boost signal by 20-30% in tight spaces. Another common issue is network interference. If you’re in a busy office or a mall where there are lots of other Wi-Fi networks, they can crowd the 2.4 GHz band, which is the default for most routers. The fix here is to switch your OPS’s Wi-Fi connection to the 5 GHz band, if your router supports it. Most modern routers do, and Wi-Fi 5 and 6 cards in our Customized OPS PCs can connect to both bands. To do that, in Windows, go to Settings > Network & Internet > Wi-Fi > Manage known networks, select your network, click Properties, then toggle on “Connect even if the network is not broadcasting its name” and make sure “Preferred band” is set to 5 GHz. In Linux, you can set this in the network settings menu under your SSID’s properties, or run a quick terminal command to prioritize the 5 GHz band.
Another issue I see a lot is that the OPS PC will connect to Wi-Fi fine, but it drops the connection every 10 or 15 minutes. That’s almost always a power saving setting. Both Windows and Linux have built-in settings that turn off the Wi-Fi adapter to save power, which is great for laptops, but for OPS PCs that are running 24/7 in a kiosk or classroom, that’s a problem. Let’s fix that. For Windows: go to Device Manager (right-click the Start button, select Device Manager), expand “Network adapters,” right-click your Wi-Fi card, select Properties, go to the “Power Management” tab, and uncheck the box that says “Allow the computer to turn off this device to save power.” Click OK, and that’s it. For Linux: open the terminal, type sudo iwconfig wlan0 power off (replace wlan0 with your Wi-Fi adapter name if it’s different, you can find that by running iwconfig and looking for the wireless interface), and that will turn off power saving for the adapter. I always remind clients to do this before deploying their OPS PC, because a dropped connection mid-presentation or mid-transaction is way worse than a tiny bit of extra power use.
Now, let’s talk about a few custom tips that come from being a Customized OPS PC supplier, not just a regular PC seller. One thing we always build into our OPS PCs is support for hidden SSIDs. A lot of commercial networks disable broadcasting their network name for security, and a regular PC might struggle to connect, but our Customized OPS PCs have pre-configured tools to scan for non-broadcast networks, so you don’t have to spend 20 minutes troubleshooting. Another tip: if you’re using your OPS PC for streaming or transferring large files (like updating content on a digital signage display), assign a static IP address to it instead of using DHCP. DHCP is fine for basic connections, but static IPs make it easier to remotely access the OPS for updates, and they prevent the device from losing connection if the router reassigns IP addresses. To set a static IP in Windows, go to Settings > Network & Internet > Wi-Fi > Manage known networks, select your network, click Properties, under “IP assignment,” select “Edit,” then choose “Manual,” toggle on “IPv4,” enter your static IP, subnet mask, default gateway, and DNS servers (your network admin can give you these). In Linux, you can set a static IP in the network settings menu, or use Netplan for a more permanent setup.
I also want to address a common mistake people make: using a generic Wi-Fi adapter instead of the one we spec for your Customized OPS PC. A lot of clients try to save money by buying a cheap USB Wi-Fi adapter to plug into the side of the OPS, but OPS PCs are designed to have the Wi-Fi card installed internally, and USB adapters can cause driver conflicts, slow speeds, and even damage the OPS’s ports if they’re too big. When you order a Customized OPS PC from us, you can choose your exact Wi-Fi card (from basic Wi-Fi 5 to high-performance Wi-Fi 6E for 6 GHz networks) and we install it for free, no extra cost, and it’s guaranteed to work with the OPS’s hardware and operating system, so you don’t have to waste time troubleshooting.
At the end of the day, connecting your Customized OPS PC to Wi-Fi is simple once you know the specific steps for these devices—they’re not like laptops or desktops, they’re built to be mounted and run for years without much maintenance, so the connection process is designed to be quick and reliable. If you’re still having trouble, or if you have specific needs for your OPS PC (like connecting to a corporate VPN, or needing Wi-Fi for a large multi-room setup), our team is here to help. We customize every OPS PC to fit your exact use case, so we can adjust the Wi-Fi card, software, and settings to make sure your connection works perfectly for you and your space.
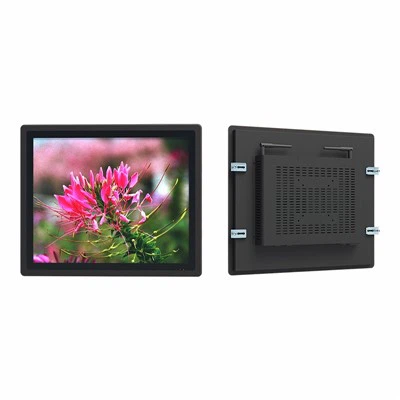
If you’re in the market for a Customized OPS PC, or if you have questions about setting up Wi-Fi or any other feature, don’t hesitate to reach out to our team to discuss your needs. We work with businesses, schools, retailers, and more, so whatever your use case is, we can build an OPS PC that works for you.
All in One PC 23.8 Inch References
- Wi-Fi Alliance. (2021). Wi-Fi 6 (802.11ax) Technology Overview.
- Linux Foundation. (2022). Ubuntu Wireless Networking Best Practices for Embedded Devices.
- Microsoft Learn. (2023). Configure Wireless Network Connections on Windows 10/11 Devices.
- Display Industry Association. (2022). OPS PC Hardware Compatibility Guidelines for Commercial Displays.
Shenzhen HJS Technology Group
Shenzhen HJS Technology Group is one of the most experienced customized ops pc manufacturers and suppliers in China, featured by quality products and good service. Please rest assured to buy CE approved customized ops pc made in China here from our factory. For price consultation, contact us.
Address: F10, Wanhe Technology Building C, No. 7 HuiTong Road, Fenghuang Street, Guangming New District, Shenzhen. China.
E-mail: info@hjs-pc.com
WebSite: https://www.hjs-pc.com/
